https://www.youtube.com/watch?v=C6QeSt_M2Ug
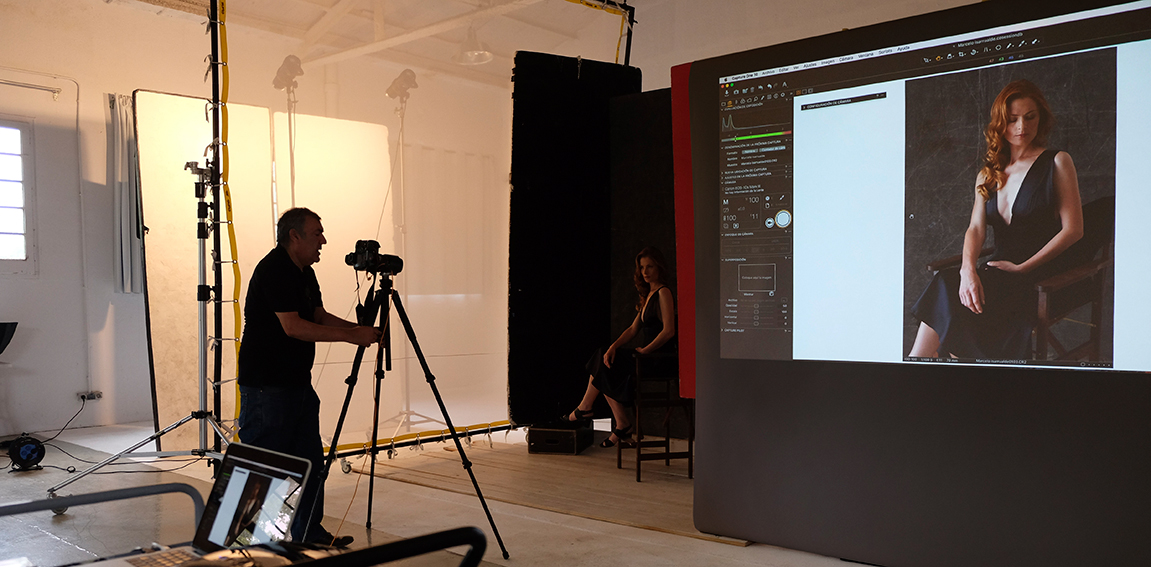
Some time ago Profoto proposed me to do a workshop on lighting techniques with their equipment. The aim was to test everything from very powerful equipment to simple and practical equipment that is easy to move.
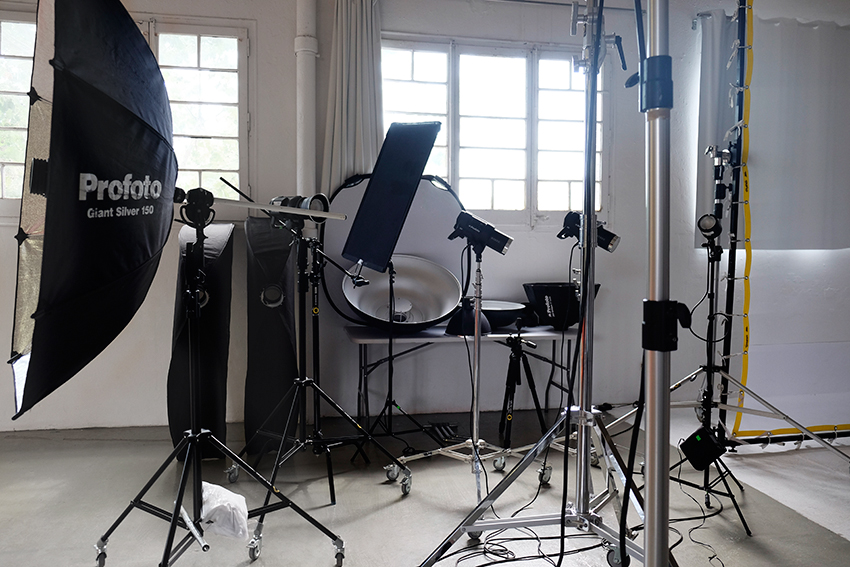
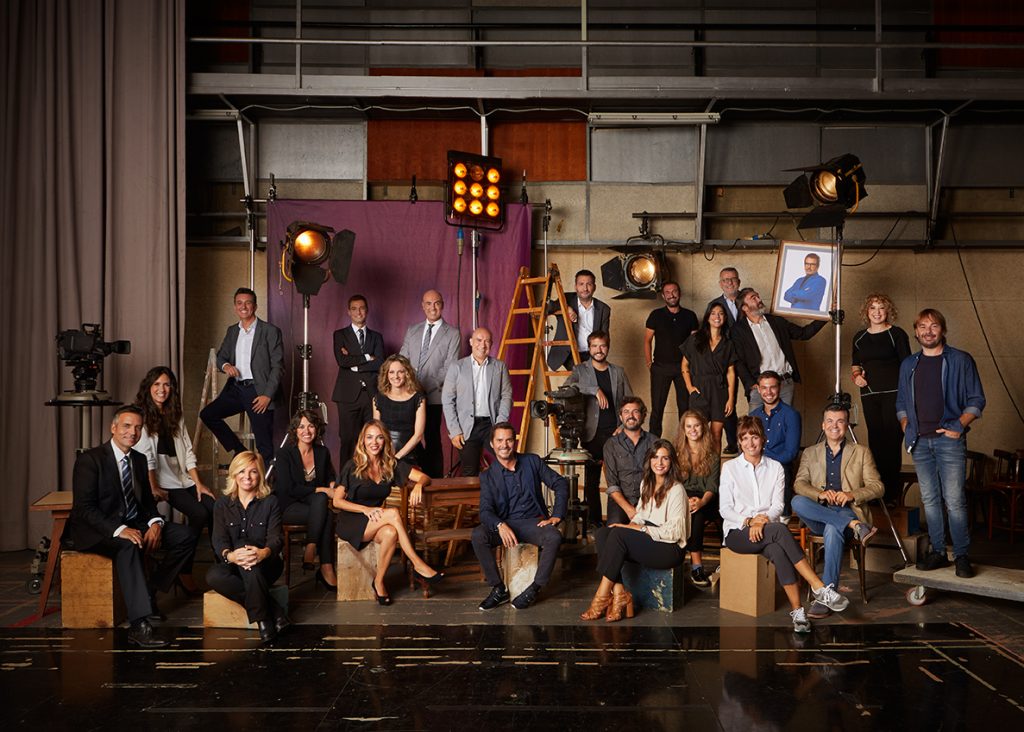
We had the invaluable collaboration of Tops Studios, in Barcelona, who in addition to allowing us to work in the huge facilities they have, provided us with all the diverse and wide range of accessories they have.

Top Studios
The event, which was attended by a large audience, was held in four hours. The challenge was to be able to make at least 4 or 5 different lighting schemes, with different fixtures from the brand’s range. I started with a single point of light, very hard, to simulate sunlight on a clear day. In these conditions the real sunlight is very harsh and to simulate it in the studio I used a modifier with a Fresnel lens in front. As I explained in another post, the characteristics of this lens are spectacular as they emit a very parallel beam of light, almost like the Sun. An important fact in this shot is that it is not enough to have a Fresnel, it must be placed as far as possible from the model, so that the light is distributed as evenly as possible, without light drops within the frame of the shot.
lighting scheme I
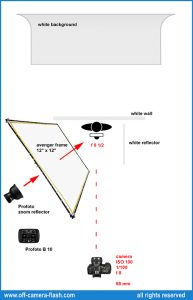
The second shot was a somewhat softer alternative to the first. Although the light position was the same, I changed the Fresnel for a torch with a standard reflector zoom reflector. In this case I placed in front of the flash a large 3.6 x 3.6 mts canopy. which diffused the light somewhat. The difusser had a very translucent gauze so the change was very slight, diminishing the overall contrast of the photo as can be seen in the shaded areas. However, the outline of the shadow remained quite defined. However, the cloth absorbed a point of EV and I had to shoot at F8 instead of f11.
Lighting scheme II
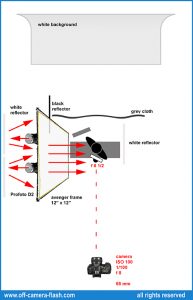
For the third photo, we set up a simple set and changed the model’s clothes. Here I wanted the light to be a little more lateral, as if it were a real window. For this I used the same Avenger canopy, but I placed it at a 90º angle to the camera. This very lateral position of the light is often called “axe light”. To further lower the contrast compared to the previous shots I bounced two flashes off a white surface. In this way the illumination surface would be larger because the bounce of light spread the light over the gauze more evenly than when I only used a flash aimed to pass the light directly through the gauze. In this case I used two flashes so that the bounce of the light would be better distributed and at the same time compensate for the loss of light due to bounce.
Lighting scheme III
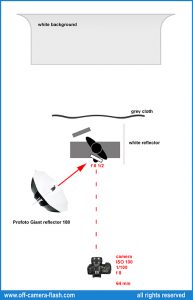
The following photo has a more enveloping light since a large 150 cms reflector was used. diameter. The light it produces is very soft and very well distributed as the torch bounces the light against the inside surface of the umbrella and then that light passes through a diffuser surface. The light is not scattered and is very directional towards the model so that less light reaches the background without “shielding” with a black flag, thus achieving a very effective and simple set.

Lighting scheme IV
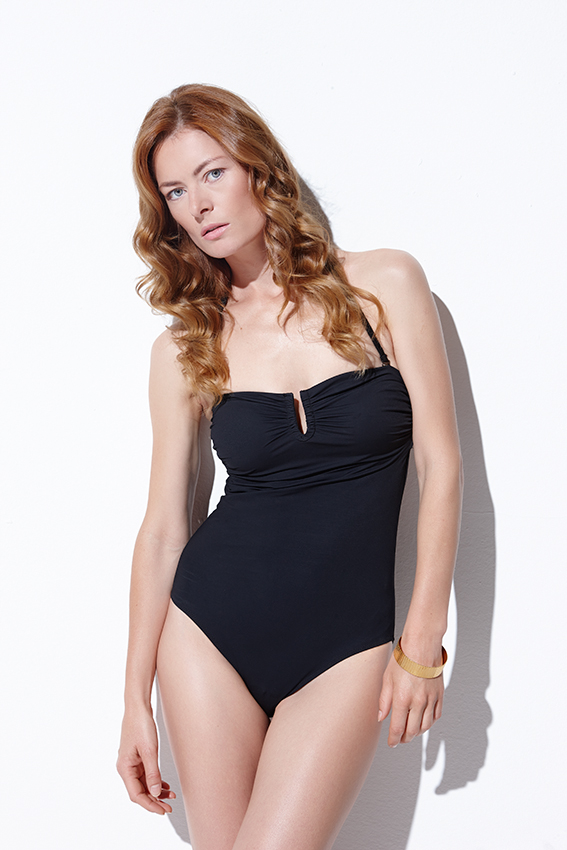
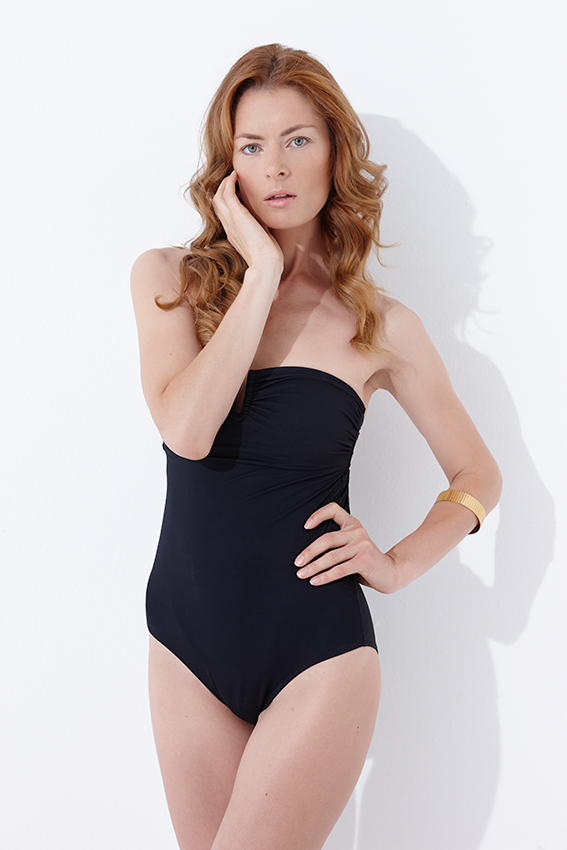
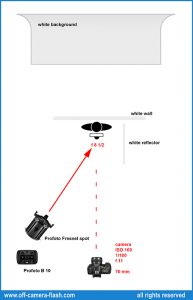
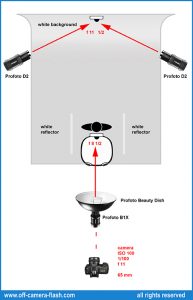
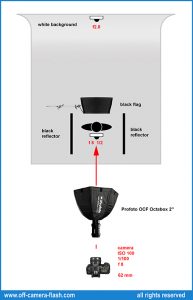
The workshop continued with the use of more compact equipment. A Profoto B1X flash, which can run on batteries, was the only light source, with a Beauty Dish bank with diffuser as a modifier. The somewhat oblique frontal placement of the light allowed for flat lighting, typical of a regular beauty set. The predominance of light tones in an image is called “high key” or “high key”. Looking at the histogram of this photo, we can see that it lies to the right, with a large peak at value 255. This is because the background is overexposed at one point to make it white without detail.
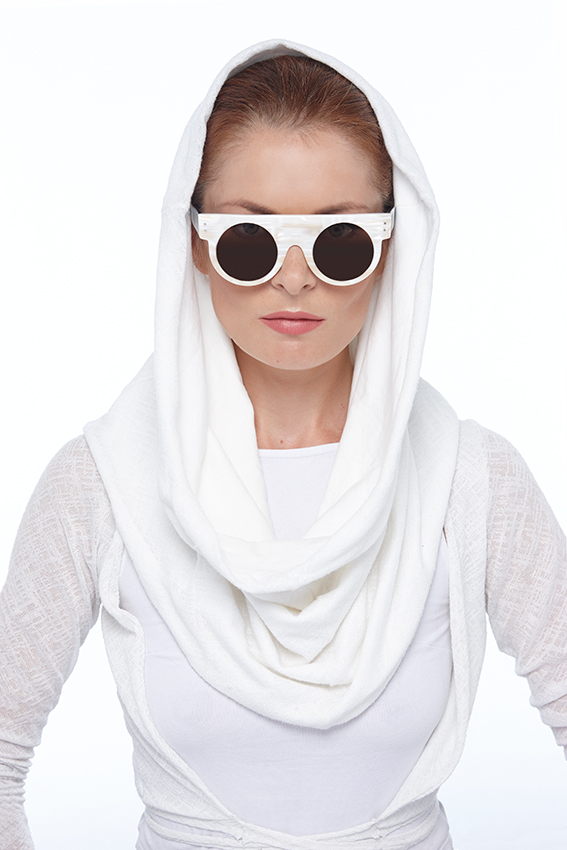
Lighting diagram V

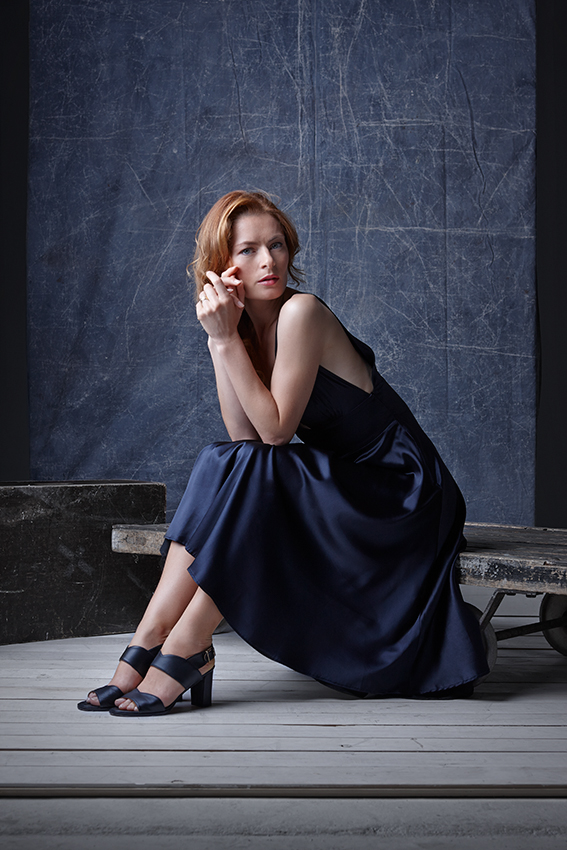
The opposite version of the “high key” is, of course, the “low key”. Here the histogram is drawn upside down, with a large amount of dark tones and touching the left side, where the pixels with no information, i.e. blacks without detail, are located.
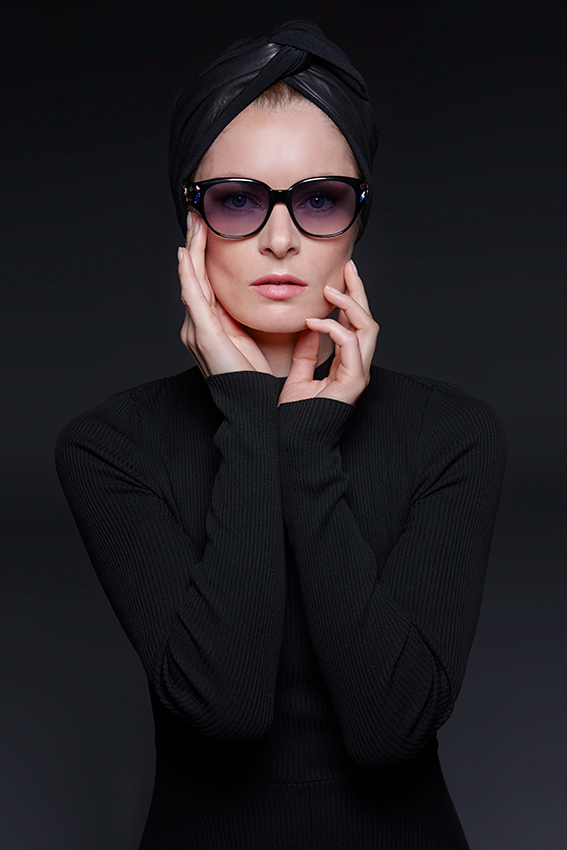
Lighting diagram VI

It can be seen in this photograph that the background, despite being white, is almost black, with a slight gradient from top to bottom. This is due to the fact that being far away from the set and following the parameters of the “inverse of the square of the distance law” the amount of light reaching the background was very little. The gradient occurs because a black Avenger flag was placed above the model’s head to reduce the incidence of light on the white background wall.
Finally, there was still some time left, the audience wanted to see how these flashes froze the movement. I didn’t plan on it, but with the model’s cordial acceptance, I decided to take a single, final photo, dousing her with water. I repeated the previous set but added two lights with “strip” windows to outline her hair.
And that’s how we finished the workshop, with seven light schemes in 4 hours! A very productive day, accompanied by a great team of collaborators.
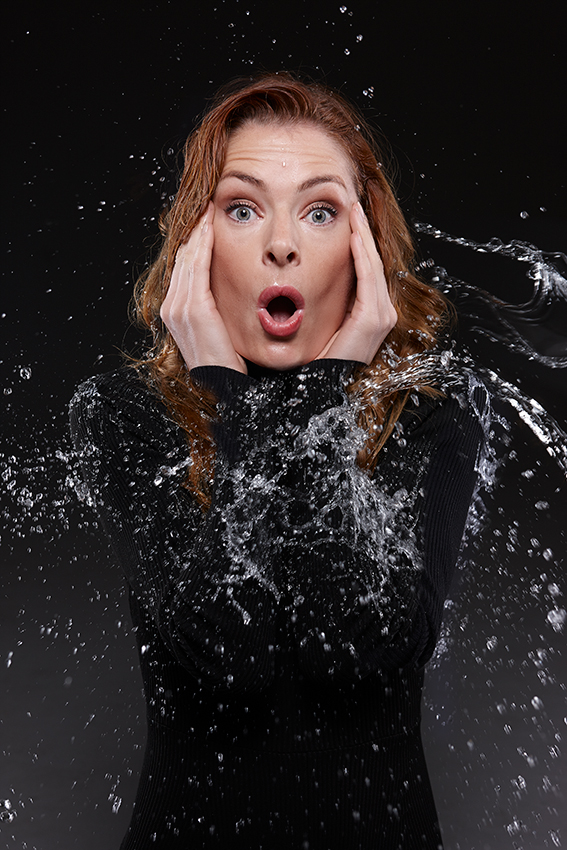
Lighting scheme VII
lighting scheme I
Lighting scheme II
Lighting scheme III
Lighting scheme IV
Lighting diagram V
Lighting diagram VI
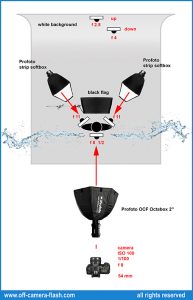
Lighting scheme VII
All rights reserved. © Isarrualde Photography
No part of this publication may be reproduced in any form or by any means without the written permission of the author.